【python】进程与线程,,No1:多进程fro
【python】进程与线程,,No1:多进程fro
No1:
多进程
from multiprocessing import Processimport os# 子进程要执行的代码def run_proc(name): print(‘Run child process %s (%s)...‘ % (name, os.getpid()))if __name__==‘__main__‘: print(‘Parent process %s.‘ % os.getpid()) p = Process(target=run_proc, args=(‘test‘,)) print(‘Child process will start.‘) p.start() p.join() print(‘Child process end.‘)
运行结果
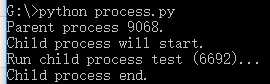
创建一个Process实例,用start()方法启动,join()方法可以等待子进程结束后再继续往下运行,通常用于进程间的同步。
No2:
进程池
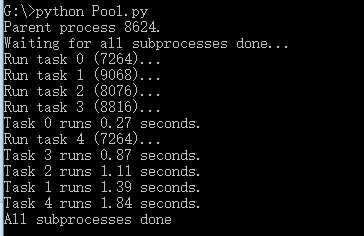
from multiprocessing import Poolimport os, time, randomdef long_time_task(name): print(‘Run task %s (%s)...‘ % (name, os.getpid())) start = time.time() time.sleep(random.random() * 3) end = time.time() print(‘Task %s runs %0.2f seconds.‘ % (name, (end - start)))if __name__==‘__main__‘: print(‘Parent process %s.‘ % os.getpid()) p = Pool(4) for i in range(5): p.apply_async(long_time_task, args=(i,)) print(‘Waiting for all subprocesses done...‘) p.close() p.join() print(‘All subprocesses done.‘)
运行结果
No3:
子进程
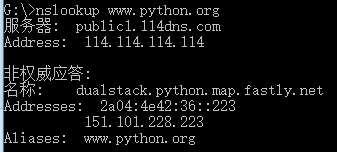
import subprocessprint(‘$ nslookup www.python.org‘)r = subprocess.call([‘nslookup‘,‘www.python.org‘])print(‘Exit code:‘,r)
运行结果
No4:
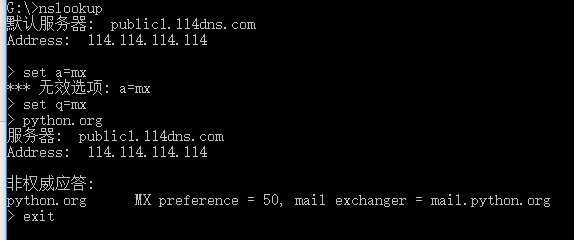
import subprocessprint(‘$ nslookup‘)p=subprocess.Popen([‘nslookup‘],stdin=subprocess.PIPE,stdout=subprocess.PIPE,stderr=subprocess.PIPE)output,err=p.communicate(b‘set q=mx\npython.org\nexit\n‘)print(output.decode(‘utf-8‘))print(‘Exit code:‘,p.returncode)
运行结果
No5:
进程间通信
from multiprocessing import Process,Queueimport os,time,randomdef write(q): print(‘Process to write: %s‘ % os.getpid()) for value in[‘A‘,‘B‘,‘C‘]: print(‘Put %s to queue...‘ % value) q.put(value) time.sleep(random.random()) def read(q): print(‘Process to read: %s‘ % os.getpid()) while True: value = q.get(True) print(‘Get %s from queue.‘ % value) if __name__==‘__main__‘: q=Queue() pw=Process(target=write,args=(q,)) pr=Process(target=read,args=(q,)) pw.start() pr.start() pw.join() pr.terminate()
在Unix/Linux下,可以使用fork()调用实现多进程。
要实现跨平台的多进程,可以使用multiprocessing模块。
进程间通信是通过Queue、Pipes等实现的。
No6:
多线程
Python的标准库提供了两个模块:_thread和threading,_thread是低级模块,threading是高级模块,对_thread进行了封装。绝大多数情况下,我们只需要使用threading这个高级模块。
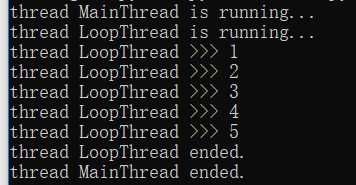
import time,threadingdef loop(): print(‘thread %s is running...‘ % threading.current_thread().name) n=0 while n<5: n=n+1 print(‘thread %s >>> %s‘ % (threading.current_thread().name,n)) time.sleep(1) print(‘thread %s ended.‘ % threading.current_thread().name) print(‘thread %s is running...‘ % threading.current_thread().name)t = threading.Thread(target=loop,name=‘LoopThread‘)t.start()t.join()print(‘thread %s ended.‘ % threading.current_thread().name)
运行结果
No7:
锁Lock
import time,threadingblance=0lock=threading.Lock()def run_thread(n): for i in range(100000): lock.acquire() try: change_it(n) finally: lock.release()
死锁
import threading,multiprocessingdef loop(): x=0 while True: x = x^1for i in range(multiprocessing.cpu_count()): t = threading.Thread(target=loop) t.start()
Python的线程虽然是真正的线程,但解释器执行代码时,有一个GIL锁:Global Interpreter Lock,任何Python线程执行前,必须先获得GIL锁,然后,每执行100条字节码,解释器就自动释放GIL锁,让别的线程有机会执行。这个GIL全局锁实际上把所有线程的执行代码都给上了锁,所以,多线程在Python中只能交替执行,即使100个线程跑在100核CPU上,也只能用到1个核。
GIL是Python解释器设计的历史遗留问题,通常我们用的解释器是官方实现的CPython,要真正利用多核,除非重写一个不带GIL的解释器。
所以,在Python中,可以使用多线程,但不要指望能有效利用多核。如果一定要通过多线程利用多核,那只能通过C扩展来实现,不过这样就失去了Python简单易用的特点。
不过,也不用过于担心,Python虽然不能利用多线程实现多核任务,但可以通过多进程实现多核任务。多个Python进程有各自独立的GIL锁,互不影响。
No8:
ThreadLocal
import threadinglocal_school=threading.localdef process_student(): std = local_school.student print(‘Hello,%s (in %s)‘ % (std,threading.current_thread().name)) def process_thread(name): local_school.student=name process_student()t1=threading.Thread(target=process_thread,args=(‘Alice‘,),name=‘Thread-A‘)t2=threading.Thread(target=process_thread,args=(‘Bob‘,),name=‘Thread-B‘)t1.start()t2.start()t1.join()t2.join()
No9:
分布式进程
# task_master.pyimport random, time, queuefrom multiprocessing.managers import BaseManager# 发送任务的队列:task_queue = queue.Queue()# 接收结果的队列:result_queue = queue.Queue()# 从BaseManager继承的QueueManager:class QueueManager(BaseManager): pass# 把两个Queue都注册到网络上, callable参数关联了Queue对象:QueueManager.register(‘get_task_queue‘, callable=lambda: task_queue)QueueManager.register(‘get_result_queue‘, callable=lambda: result_queue)# 绑定端口5000, 设置验证码‘abc‘:manager = QueueManager(address=(‘‘, 5000), authkey=b‘abc‘)# 启动Queue:manager.start()# 获得通过网络访问的Queue对象:task = manager.get_task_queue()result = manager.get_result_queue()# 放几个任务进去:for i in range(10): n = random.randint(0, 10000) print(‘Put task %d...‘ % n) task.put(n)# 从result队列读取结果:print(‘Try get results...‘)for i in range(10): r = result.get(timeout=10) print(‘Result: %s‘ % r)# 关闭:manager.shutdown()print(‘master exit.‘)
# task_worker.pyimport time, sys, queuefrom multiprocessing.managers import BaseManager# 创建类似的QueueManager:class QueueManager(BaseManager): pass# 由于这个QueueManager只从网络上获取Queue,所以注册时只提供名字:QueueManager.register(‘get_task_queue‘)QueueManager.register(‘get_result_queue‘)# 连接到服务器,也就是运行task_master.py的机器:server_addr = ‘127.0.0.1‘print(‘Connect to server %s...‘ % server_addr)# 端口和验证码注意保持与task_master.py设置的完全一致:m = QueueManager(address=(server_addr, 5000), authkey=b‘abc‘)# 从网络连接:m.connect()# 获取Queue的对象:task = m.get_task_queue()result = m.get_result_queue()# 从task队列取任务,并把结果写入result队列:for i in range(10): try: n = task.get(timeout=1) print(‘run task %d * %d...‘ % (n, n)) r = ‘%d * %d = %d‘ % (n, n, n*n) time.sleep(1) result.put(r) except Queue.Empty: print(‘task queue is empty.‘)# 处理结束:print(‘worker exit.‘)
【python】进程与线程
评论关闭